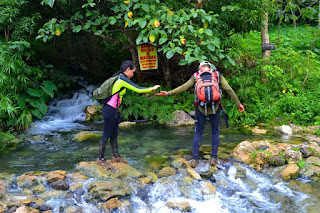
I am so fascinated with Japanese culture. I can't really tell when it started, I just know that it was something in my subconscious ever since i learned and started to watch anime series. Since then it became my dream to experience Japan right before my eyes and be stepping on its ground.
 Japan is a country not so far from Philippines. It is only 5 hours travel on board. But obtaining Japan Visa makes it so distant for Filipinos. I really thought its hard to get one because its requirements are quite intimidating but after getting our 1st tourist Visa. Its actually NOT that difficult. In fact it was easy.
 Japan is a country not so far from Philippines. It is only 5 hours travel on board. But obtaining Japan Visa makes it so distant for Filipinos. I really thought its hard to get one because its requirements are quite intimidating but after getting our 1st tourist Visa. Its actually NOT that difficult. In fact it was easy.
Basically, you just have to accomplish all the needed requirements and prove Japan Embassy that you are capable of financing your needs during your stay and you don't have any intention staying beyond your permit.
Disclaimer:
I cant or no one can guarantee your visa's approval.
Im not related to any travel agencies.
This blog only intends to give some tips and ease up your chances of getting a Japan Tourist Visa with out sponsor (based on our experience)
So this is how we get our Japan Visa.
STEP 1.
Decide what type of Japan Visa you need to apply.
There are various types of Japan Visas you can apply for, depending on your purpose; A tourist visa to visit a relative, A tourist visa with no Guarantor, Multiple entry Visa, Visa for transit, medical purposes, missionary etc.
But we will only be discussing the requirements for JAPAN VISA - TOURIST (No Guarantor/ sponsor) based on our experience.
STEP 2.
Choose a travel agency to process your visa application.
Japan Visa is FREE. However, Japanese Embassy in the Philippines are not accepting direct applications. You have to search for an accredited travel agency that will help you process your application. Of coarse, in return you have to pay for their services. In our case we went to Reli Tours and travel in Mega Mall building A. We paid 950 pesos for Single Entry Japan Tourist Visa with no guarantor.
You can search online, read reviews on travel agencies before deciding so you have more options. Usually fees are ranging from 800 - 2500 pesos. But again, there is no travel agency that can guarantee your visa's approval. All they can do is to make sure all your requirements are correct and complete before submitting it to Japan embassy.
STEP 3.
Complete all the requirements.
Make sure you have the original documents. All the copies should be on A4 size paper.
(A) Philippine Passport
Make sure your passport is valid at least six months prior to the intended travel date and it has 2 blank pages.
(B) Accomplished Japan Visa Application Form
> It is available for download in your chosen travel agency website.
> Print in A4 size paper.
> If your going to hand write make sure there is no erasure.
> Fill the form properly. Put N/A in all spaces not applicable to you.
> There are sections for the Hotel/ Accommodation address as well as the airlines. Its not necessary to book beforehand. Just write your intended airline to book and the hotel name / address you plan to stay.
> Embassy may not accept application with blank item, no signature or no date in the form.
> Embassy may deny the application that is filled out incorrectly or wrong information.
(C) 4.5cm x 4.5cm Photo (white back ground)
> Most of the photo studio know the required photo for you visa application. They would normally instruct you what to do (e.g. ears should be shown, your face should be neutral, etc)
> Photo must be taken within 6 months.
> You should write your name, birthday at the back of your photo before pasting it on the Visa Application Form.
(D) Authenticated Birth Certificate (NSO)
> It should be original copy and not more than 1 year from the time issued.
> In case unreadable, bring your birth certificate from the local civil registrar.
(D.a) Authenticated Marriage Certificate
> If only married of coarse. It must be original and not more than 1 year from the time issued.
※ Applicants are exempted from submitting (D) and (D.a) indicated above if they can submit old/valid passports with used Japan visa.
(E) Daily Schedule in Japan (Travel Itinerary)
You can ask your travel agency for the form or download it from their website.
Its doesn't have to detailed. This is only to give them idea on how are you planning your stay.
(F) Bank Certificate
> Must be original copy and validity is three (3) months from the date of issue.
* How much should you have in your bank account?
The Embassy did not mention any specific amount requirement.
But from what i heard you should have at least 10,000 pesos multiply the length of your stay. (e.g. 10,000 x 5 days = 50,000 pesos) let say this would be the minimum so its better if you have more.
Also keep in mind that your bank certificate will show your monthly cash flow. Therefore, its a bad idea to deposit a sudden huge amount just before your visa application.
(G) Income Tax Return ( ITR)
> it should be the latest and clear copy.
> If applicant is business owner and submits the ITR without applicant's name, please attach the copy of Business Permit from city hall.
> if you dont have ITR like me (OFW) just write a letter explaining why, or bring Tax exemption from from BIR, or certificate of employment with your return ticket to the country you are employed.
STEP 4.
The waiting game starts.
If you already submitted your documents to the travel agency, you'll just have to wait until they notify you when can you get your passport back. Visa processing normally takes 2 -7 days. I got mine in 2 days while more than a week for my husband.
Take note, you cant take back all the documents you submitted except for your passport either approved or denied.
So God Bless and Good luck!
So God Bless and Good luck!


